

Snow Pea ‘Oregon Giant’ Vegetable Seeds
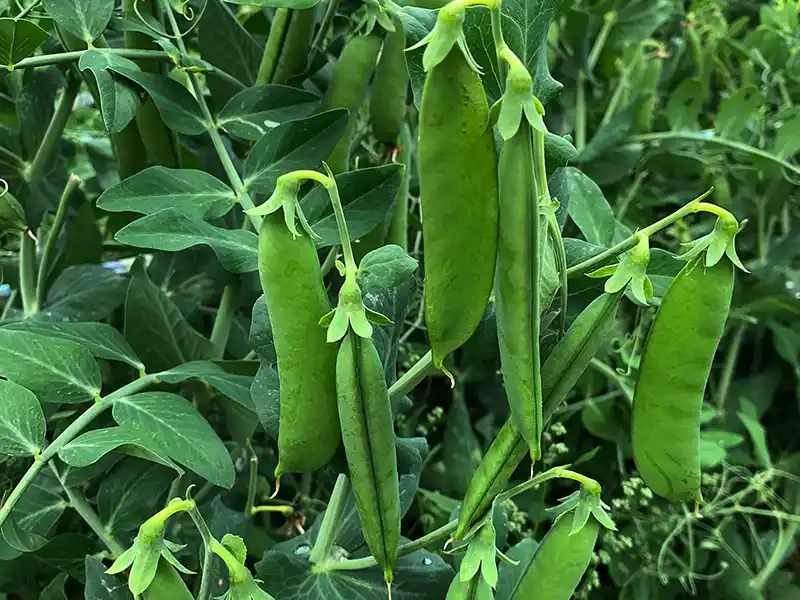
Oregon Giant snow peas produce generous crops of large, flat green pods with a sweet flavour and crisp texture. Their compact vines are easy to manage with a low trellis, making them a practical choice for home vegetable gardens, raised beds and market garden plantings.
Harvest the whole edible pods while tender for salads, stir-fries and lightly steamed vegetable dishes. This variety can also be grown for young pea shoots using seed suitable for edible microgreen production.
Botanical name: Pisum sativum
Why Grow Oregon Giant Snow Peas?
- Large edible pods: Broad, medium-green pods that are easy to pick and prepare.
- Sweet flavour: Crisp, tender snow peas for fresh eating and cooking.
- Productive plants: Regular harvesting helps maintain continued pod production.
- Compact growth: Suitable for smaller vegetable patches with low climbing support.
- Two growing options: Grow for garden snow peas or tender leafy pea shoots.
Plant Details
- Plant type: Cool-season annual snow pea.
- Plant height: Approximately 75–100 cm, depending on growing conditions.
- Growth habit: Compact vines; a low trellis helps keep pods off the soil and makes picking easier.
- Position: Full sun, sheltered from strong winds.
- Harvest: Approximately 60–70 days from sowing, depending on conditions.
- Best for: Home vegetable gardens, raised beds and small-scale fresh pod production.
How to Sow Oregon Giant Snow Pea Seeds
- Sowing method: Direct sow into prepared garden beds.
- Sowing depth: Approximately 2–3 cm.
- Plant spacing: 5–8 cm apart.
- Row spacing: 45–60 cm apart; allow extra room where needed for trellis access.
- Germination: Usually 7–14 days; allow longer in cold soil.
- Soil: Fertile, well-drained soil enriched with mature compost.
- Preferred soil pH: Approximately 6–7. Add lime only if a soil test indicates it is needed.
Install pea netting or a low trellis before sowing. Sow into moist soil and maintain enough moisture for germination without waterlogging. Pre-soaking is optional for garden sowing; avoid planting soaked seed into cold, saturated ground.
When to Sow Snow Peas in Australia
Snow peas grow best in cool to mild weather. Plan sowing so flowering and pod development avoid extreme heat. Plants tolerate cool conditions, but frost can damage flowers and developing pods.
| Climate Zone | Suggested Sowing Season | Growing Notes |
|---|---|---|
| Temperate | Autumn to early spring | Adjust sowing to local frost conditions and aim to harvest before summer heat. |
| Subtropical | Autumn to winter | Wait for cooler weather. Avoid hot, humid periods and poorly drained soil. |
| Tropical | Coolest part of the dry season, where suitable | Best trialled in cooler elevated locations. Persistent heat may limit flowering and pod production. |
| Cool / Alpine | Spring; autumn where winters are mild | Avoid frozen or waterlogged soil and time flowering to reduce exposure to severe frost. |
| Arid / Semi-arid | Autumn to winter, depending on frost | Choose mild conditions and provide reliable irrigation. Avoid flowering during extreme heat. |
This is a general seasonal guide. Local temperatures, elevation and frost dates will affect the best sowing window.
Growing Tips
- Support the vines: Use pea netting, twiggy supports or a low trellis.
- Water consistently: Maintain even soil moisture, especially during flowering and pod development.
- Encourage airflow: Avoid overcrowding and water at soil level where practical.
- Mulch lightly: Help conserve moisture while keeping mulch clear of stems.
- Pick regularly: Harvest every few days once pods reach picking size.
Harvesting Oregon Giant Snow Peas
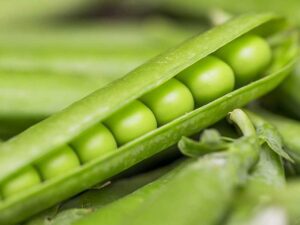
Pick pods when they are broad, crisp and still mostly flat, before the peas inside become noticeably swollen. Check plants regularly, as pods develop quickly in mild weather.
Enjoy freshly picked snow peas in salads, stir-fries or lightly cooked vegetable dishes. Refrigerate promptly after picking to preserve quality.
Growing Oregon Giant as Pea Shoots or Microgreens
Grow tender pea shoots in trays using untreated seed suitable for edible shoot production, clean equipment and fresh drinking-quality water.
- Prepare the tray: Add approximately 2–3 cm of seed-raising mix or a suitable coir-based growing medium to a tray with drainage. Level and moisten the surface.
- Soak the seed: Soak in cool water for approximately 6–8 hours, using plenty of water to allow for expansion. Drain and discard the soaking water.
- Sow evenly: Spread soaked seeds across the surface in a dense single layer without piling them on top of one another. For a 10 × 20-inch tray, approximately 250 g of dry seed is a starting point; adjust to seed size and tray coverage.
- Cover briefly: Place a clean tray over the seeds for approximately 2–4 days to help maintain moisture during germination. Check daily and water only as needed.
- Move into light: Once shoots are established and lifting the cover, remove it and provide bright indirect light or suitable grow lights.
- Maintain moisture: Keep the growing medium moist without standing water. Bottom-water once roots are established and maintain good airflow.
- Harvest: Cut shoots above the growing medium when leaves have opened and stems are tender, usually around 10–14 days after sowing. Timing varies with temperature and light.
Harvest with clean scissors, keeping seeds and growing medium out of the cut shoots. Refrigerate harvested shoots promptly.
Reviews
There are no reviews yet.