

Red Clover Sprouting Seeds
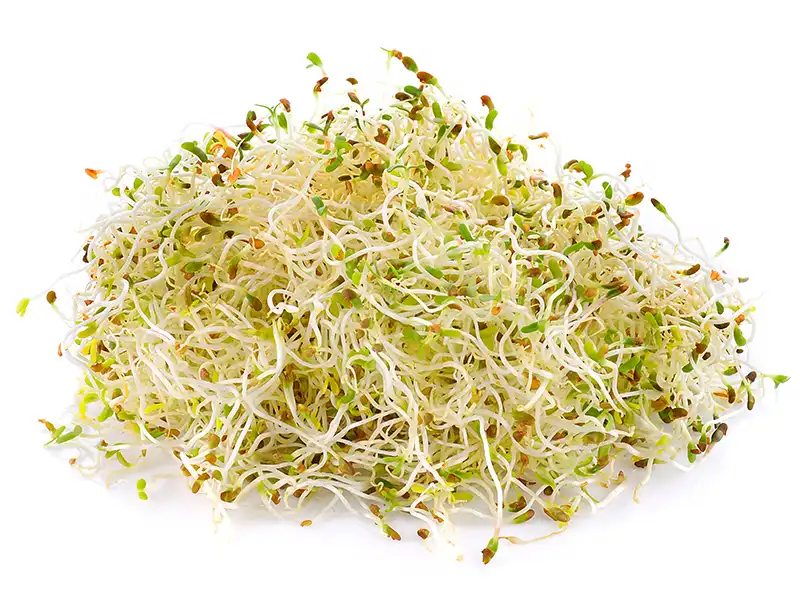
Grow fresh red clover sprouts at home in approximately 4–6 days. Red clover sprouting seeds (Trifolium pratense) produce fine, crisp sprouts with delicate green leaves and a pleasantly mild, fresh flavour. They are suitable for growing in glass jars, sprouting trays, hemp bags and other countertop sprouting systems.
Red clover sprouts are similar in appearance and growing habit to alfalfa sprouts. Their mild flavour and delicate texture make them a versatile choice for salads, sandwiches, wraps, grain bowls and homemade sprout mixes.
Red clover is easy to grow indoors throughout the year and requires no soil or garden. The small seeds germinate quickly using a simple soak, rinse and drain method, making them suitable for beginners as well as regular home sprouters.
Because red clover has a relatively mild flavour, it can be grown on its own or combined with stronger-tasting sprouting varieties such as broccoli, radish, mustard and fenugreek.
Seedmart red clover sprouting seeds are available in practical packet and bulk quantities for home growers and larger-volume sprouting requirements.
Red Clover Sprouting Seed Details
| Botanical name | Trifolium pratense |
|---|---|
| Family | Fabaceae |
| Recommended soak | Approximately 6–8 hours |
| Typical sprouting time | Approximately 4–6 days |
| Flavour | Mild, fresh and subtly sweet |
| Growing methods | Sprouting jar, tray, hemp bag or fine-mesh sprouter |
| Availability | Retail packets and bulk quantities |
Why Choose Red Clover Sprouting Seeds?
- Produces fine, crisp sprouts with delicate green leaves.
- Mild, fresh flavour suitable for a wide range of meals.
- Fast growing, with a typical harvest in approximately 4–6 days.
- Suitable for indoor sprouting throughout the year.
- Can be grown without soil, fertiliser or an outdoor garden.
- Suitable for jars, trays, hemp sprouting bags and countertop sprouters.
- Can be grown alone or combined with other sprouting varieties.
- Available in smaller packets and economical bulk quantities.
- Supplied by an Australian-owned seed company.
What Do Red Clover Sprouts Taste Like?
Red clover sprouts have a mild, clean flavour with a subtle fresh sweetness. They are generally much less peppery than radish or mustard sprouts and have a delicate texture similar to alfalfa.
Their gentle flavour makes red clover particularly useful in homemade sprout mixes. It can provide a mild base alongside more strongly flavoured varieties such as broccoli, radish, mustard or fenugreek.
Red clover sprouts can also be grown on their own for a simple everyday sprout suitable for sandwiches, wraps, salads and fresh bowls.
How to Grow Red Clover Sprouts in a Jar
The glass jar method is one of the simplest ways to grow red clover sprouts at home. Because clover seeds are small, use a jar fitted with a fine-mesh sprouting lid or another suitable cover that allows effective rinsing and drainage while retaining the seeds.
-
Add the seeds.
Place approximately 1–2 tablespoons of red clover sprouting seeds into a clean jar. Allow plenty of room for the developing sprouts to expand. -
Soak for approximately 6–8 hours.
Cover the seeds generously with cool, clean water and leave them to soak. -
Drain thoroughly.
Pour away the soaking water and rinse the seeds with fresh, cool water. Drain as much excess water as possible from the jar. -
Position the jar at an angle.
Place the jar upside down at an angle so excess moisture can continue to drain while air circulates through the container. -
Rinse every 8–12 hours.
Fill the jar with fresh water, gently rinse the developing sprouts and drain thoroughly. Repeat approximately twice daily, or as conditions require. -
Allow the sprouts to develop.
Continue rinsing and draining until the sprouts reach your preferred size. Once the leaves begin to develop, indirect natural light can help them become green. -
Harvest and refrigerate.
Red clover sprouts are commonly ready in approximately 4–6 days. Give them a final rinse, drain thoroughly and refrigerate promptly in a clean container.
Tips for Growing Red Clover Sprouts Successfully
- Use clean equipment: Thoroughly clean your jar, sprouting lid and other equipment before beginning each batch.
- Avoid overcrowding: Clover seeds expand considerably as they germinate, so leave adequate space in the sprouting container.
- Drain after every rinse: The seeds should remain moist during germination but should not sit in standing water.
- Maintain airflow: Good air circulation becomes increasingly important as the sprouts become denser.
- Gently redistribute the sprouts: A gentle shake after rinsing can help prevent the developing sprouts from forming a tightly packed mass.
- Avoid excessive heat: Keep the sprouting container away from hot windows and strong direct sunlight.
- Use indirect light for greening: Once the leaves develop, indirect natural light encourages their characteristic green colour.
- Refrigerate promptly: Drain harvested sprouts thoroughly before transferring them to the refrigerator.
How to Use Red Clover Sprouts
Red clover sprouts can be used in many of the same ways as alfalfa and other mild leafy sprouts. Their fine texture and subtle flavour make them particularly suitable for fresh dishes.
Try adding red clover sprouts to:
- Salads and salad bowls.
- Sandwiches, rolls and burgers.
- Wraps and pita pockets.
- Rice, noodle and grain bowls.
- Omelettes and scrambled eggs.
- Cold noodle dishes.
- Homemade sprout blends.
- Fresh garnishes for soups and savoury meals.
For the best texture, add red clover sprouts after cooking rather than exposing the delicate shoots to prolonged heat.
Red Clover Sprouts vs Alfalfa Sprouts
Red clover and alfalfa are both members of the Fabaceae family and produce fine-stemmed, mild-flavoured sprouts. They can also be grown using very similar jar-sprouting methods.
| Feature | Red Clover Sprouts | Alfalfa Sprouts |
|---|---|---|
| Botanical name | Trifolium pratense | Medicago sativa |
| Flavour | Mild, fresh and subtly sweet | Mild, fresh and delicate |
| Typical harvest | Approximately 4–6 days | Approximately 4–6 days |
| Growing method | Jar, tray, hemp bag or sprouter | Jar, tray, hemp bag or sprouter |
Both varieties are useful choices for growers who prefer mild leafy sprouts. Red clover and alfalfa can be grown separately or incorporated into mixed sprouting blends.
Red Clover Sprouts vs Red Clover Microgreens
Red clover seeds can be grown as either sprouts or microgreens, but the growing method and harvest stage are different.
| Feature | Red Clover Sprouts | Red Clover Microgreens |
|---|---|---|
| Typical harvest | Approximately 4–6 days | Usually grown for longer before harvest |
| Growing method | Usually grown in a jar or sprouter | Usually grown densely in a shallow tray |
| Growing medium | No soil required | Commonly grown on soil, coir, hemp or another growing medium |
| Harvested portion | The young shoot, root and remaining seed are generally harvested together | The stems and leaves are cut above the growing medium |
Growing Red Clover Sprouts in Warm Weather
Sprouts generally perform best under moderate indoor conditions. During hot or humid Australian weather, pay particular attention to cleanliness, airflow and effective drainage.
Keep the sprouting container in a cool, well-ventilated position away from hot windows and direct sunlight. Check the sprouts regularly and adjust rinsing as conditions require, always allowing the seeds and sprouts to drain thoroughly afterwards.
Frequently Asked Questions
How long do red clover sprouts take to grow?
Red clover sprouts are commonly ready to harvest in approximately 4–6 days. Growing time can vary depending on temperature, airflow, seed quantity and the stage at which you prefer to harvest them.
How long should red clover seeds be soaked?
Soak red clover sprouting seeds for approximately 6–8 hours before draining them and beginning the regular rinse cycle.
How often should red clover sprouts be rinsed?
Rinse and drain the developing sprouts approximately every 8–12 hours. Pay particular attention to thorough drainage because a dense mass of fine sprouts can retain moisture.
Can red clover sprouts be grown in a glass jar?
Yes. A glass sprouting jar is one of the simplest ways to grow red clover sprouts. Use a fine-mesh sprouting lid or another suitable cover that retains the small seeds while allowing water to drain freely.
Do red clover sprouts need soil?
No. Red clover sprouts are normally grown without soil. They can be germinated and grown using water in a sprouting jar, hemp bag, tray or another suitable sprouting system.
Do red clover sprouts need sunlight?
Red clover seeds do not require strong light during initial germination. Once the shoots and leaves develop, indirect natural light can encourage the leaves to become green. Avoid placing a glass sprouting jar in hot, direct sunlight.
What do red clover sprouts taste like?
Red clover sprouts have a mild, fresh flavour with a subtle sweetness. Their flavour is considerably gentler than peppery sprouts such as radish and mustard, making them suitable for eating alone or adding to mixed sprout blends.
Are red clover sprouts similar to alfalfa sprouts?
Yes. Red clover and alfalfa produce similar fine-stemmed leafy sprouts and both have relatively mild flavours. They are different plant species, but their basic home-sprouting methods are very similar.
Can red clover be mixed with other sprouting seeds?
Yes. Its mild flavour makes red clover suitable for combining with other sprouting varieties. It can be paired with mild sprouts such as alfalfa or stronger-flavoured varieties such as broccoli, radish and mustard.
Can red clover seeds be grown as microgreens?
Yes. Red clover can also be grown in a shallow tray as a microgreen crop. Microgreens are generally grown for longer than sprouts and are harvested by cutting the stems above the growing medium.
How should harvested red clover sprouts be stored?
After the final rinse, allow the sprouts to drain thoroughly and refrigerate them promptly in a clean container. Excess surface moisture can reduce storage quality.
Where can I buy red clover sprouting seeds in Australia?
Seedmart supplies red clover sprouting seeds to home growers and larger-volume customers throughout Australia. Packet and bulk quantity options are available through this product page.
Free Sprouting Guide
New to growing sprouts? Download our FREE Sprouting Guide for more information about growing fresh sprouts at home.
Important Food Safety Information
Sprouts are grown in warm, moist conditions that can also support the growth of harmful bacteria. Good hygiene and careful handling are important when growing sprouts at home.
- Wash your hands before handling seeds or sprouts.
- Use clean sprouting equipment and fresh water.
- Rinse regularly and drain thoroughly.
- Keep sprouting equipment clean between batches.
- Refrigerate harvested sprouts promptly.
- Discard sprouts that develop an unusual odour, appearance or signs of deterioration.
Nora Halliday –
Very happy with what I received nice and fresh once sprouted. Will definitely buy again
Sally Seminara –
Alfalfa sprouting seed alone or mainly combined with other seeds are a wonderful way to fill your plate up with highly nutritious living foods. Would highly recommend all there seeds.
With love and gratitude.
Beryl Hounsome –
You run your business as a business should be run fast service the seeds were package well &very fresh.will be buying more in the future. Beryl.