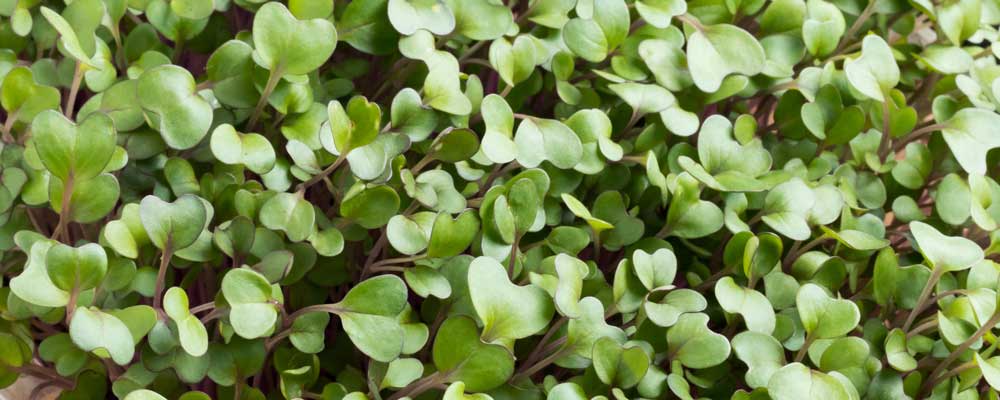
Kale microgreens are a popular choice for beginner and experienced growers. These easy and quick to grow microgreens are a nutrient dense food source. In this post, you’ll learn how to grow these microgreens from seed.
How to Grow Kale Microgreens
Equipment you will need:
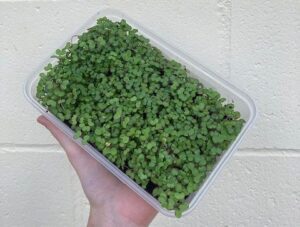
- Growing trays – For an inexpensive and eco-friendly option, try using a recycled strawberry punnet. For this guide, we used a 500mL takeaway container.
- A cover – For the trays to use during their blackout period, use a dark colour to block out all light.
- Kale seeds – For this sized container, we used 7 grams of seeds.
- Growing medium – Coir peat or hemp grow mat.
- Spray bottle – To mist the seeds with water
Notes:
- Kale seeds don’t require soaking before planting, like other seeds may.
- Their blackout period is approximately 3-4 days
- They take 4-5 days to germinate
- 8-12 days to harvest
- Ensure good circulation in your growing space and sufficient watering daily
- You can use this method to grow different varieties of kale including Kale Red Russian, Kale Scotch Curled or Kale Black Toscana.
- Tip: Kale Black Toscana is the easiest kale variety to grow as it is less sensitive to warm and hot weather. Kale is a cool season crop and usually requires a growing temperature of under 22°C.
Growing method:
-
-
- Clean all equipment
- To start this growing process, I thoroughly cleaned all of my equipment, in terms of containers and the cover I was using. This helps eliminate the threat of cross contamination or other disease inhibiting my microgreen growth.
- Growing medium
- Following this, I spread my growing medium evenly across the bottom of one 500mL container, around 3cm high.
- Get your seeds ready
- I then weighed out the seedlings using a small scale that would measure to grams
- This was because I was using 500mL takeaway containers and therefore a smaller amount of seeds across my growing medium, therefore by measuring it out, I didn’t over seed my medium.
- I used approximately 7 grams, basing this off the standard measurement of 28 grams for a 10 x 20” tray.
- Spread seeds evenly across medium and water
- I then used a smaller tupperware container (that had been thoroughly cleaned), to spread the seeds evenly over the medium. This helps with aeration, reducing the risk of mould and ensure the microgreens wont mat together.
- After spreading them across the medium, I then took my spray bottle and heavily sprayed the seeds with water. This helps them settle into the medium.
- Blackout period
- I then placed them in a well-ventilated room with a black plastic cover over the top of the container.
- These seeds do not need to be weighted as I found they shed their seed hulls relatively easily over time. However, I have read sources that recommend using a weight, I believe this could make them shed their seed hulls earlier into the process, but in turn you would get the same outcome, maybe in a few less days. Therefore, it is at your own discretion whether you believe this is suitable for you.
- Wait for germination
- Once planted, the seedlings took around 3-4 days to germinate.
- During this period, I kept them in their blackout phase and would mist them with water 1-2 times daily, depending on how dry the soil looked.
- Sprouting time
- If seed hulls were present around this time, I would suggest running your hand over the microgreens to loosen and remove these.
- When they began sprouting and the cotyledons became visible, I removed the blackout cover and moved the microgreens to a windowsill.
- This windowsill receives direct light for around 5 hours of the day, I also opened the window to aerate the soil, reducing the possibility of mould and allowing the soil to dry out daily.
- I would recommend, especially if you’re watering using a misting technique (opposed to a bottom watering method), to ensure your microgreens are in a well-ventilated space, as if they’re not, excess moisture can invite bacterial growth.
- Watering
- I maintained watering the microgreens twice daily throughout their whole growing period.
- I also rotated the container on the windowsill, this allowed the microgreens to grow relatively straight.
- Harvest time
- Mustard microgreens are known to be ready for harvest between 8-12 days.
- This was when they were a nice length, but their true leaves hadn’t come through yet, so they still were a nice, crisp flavour.
- Clean all equipment
-