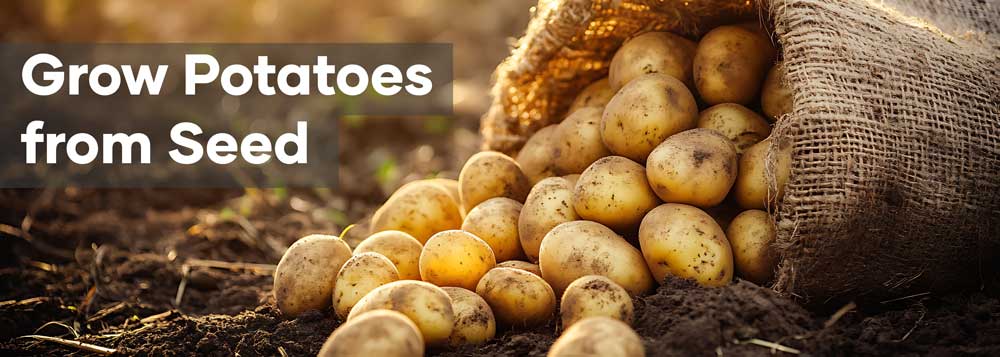
Growing your own potatoes can be a rewarding experience. It starts with choosing the right potato seeds. Also called seed potatoes, these are tubers used for planting, not true seeds. Selecting the best varieties means understanding their specific needs. This ensures healthy growth and high yields. In this guide, you’ll learn essential tips for choosing and planting potatoes, including certified disease-free options and how to prepare them. Whether you’re a home gardener or small-scale farmer, this guide will help you grow potatoes with confidence.
What Are Potato Seeds? Understanding the Basics
 Potato seeds are not what they seem. Unlike true seeds, they are tubers used to grow new plants. These tubers provide a way to propagate potatoes vegetatively.
Choosing the right seeds is essential for successful cultivation. Not all seed potatoes are the same. Quality can vary, affecting growth and yield.
- They must be firm with no signs of rot.
- Choose varieties suited to your climate and soil.
- Ensure they have at least two eyes for sprouting.
These factors help ensure a great harvest.
Why Certified Seed Potatoes Matter
These potatoes are tested to be disease-free, ensuring vigorous plants. Using uncertified potatoes might introduce diseases to your garden.
Healthier plants produce better yields and are easier to manage. Certification also means the seeds meet specific quality standards. This gives you peace of mind and improve food quality.
- Guarantees disease-free tubers.
- Ensures quality and higher germination rates.
- Helps avoid introducing new pests.
Investing in certified seed potatoes can save time and frustration. It is an assurance of quality and performance.
How to Select the Best Seed Potatoes
Start by considering the end use of your potatoes. Whether you plan to bake, fry, or boil, different varieties suit different needs.
Look for firm seed potatoes with no signs of rot or disease. They should have several eyes to encourage sprouting. Avoid those with wrinkles or soft spots as these may not sprout well.
When choosing seed potatoes, keep these factors in mind:
- Firmness and absence of decay.
- The intended culinary use, like baking or frying.
- Presence of at least two or more eyes.
Size also plays a role; smaller seed potatoes should have whole tubers. If larger, you may cut them, but ensure each piece has eyes. Allow these pieces to heal before planting to prevent rot.
Inspect seed potatoes carefully for signs of pests or disease. Selecting the right ones will set you up for a successful planting season.
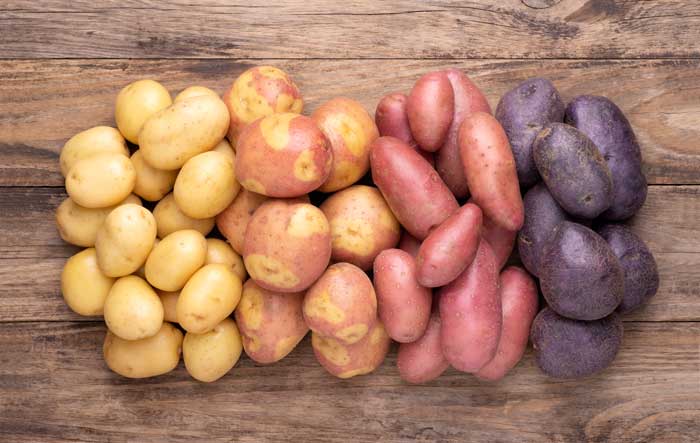
Potato Varieties: Choosing the Right Type for Your Needs
Choosing the right potato variety is crucial for a successful harvest. Each variety has unique properties suited to different culinary uses and growing conditions. Consider your region’s climate and soil when selecting a type.
Different varieties offer diverse flavors and textures, from Sebago to waxy Reds. For boiling or roasting, opt for waxy varieties that hold their shape. For fluffy mash, Sebago are a good choice.
When selecting potato varieties, consider the following:
- Climate suitability and soil preferences.
- Culinary purposes, such as mashing, roasting, or baking.
- Flavor and texture preferences.
Early-season varieties can ensure a quicker harvest in warmer climates. Meanwhile, late-season types often yield larger potatoes and are preferred where the growing season is longer. By understanding your needs, you can enjoy the best potato experience.
| Seed Variety | Season | Uses | Benefits |
|---|---|---|---|
| Dutch Cream | Late Season | Best for mashing, roasting, and boiling | Rich buttery flavour with a creamy, smooth texture. Excellent for comfort foods. |
| Ruby Lou | Mid Season | Ideal for boiling, roasting, and salads | Attractive red skin and waxy flesh. Holds shape well and has a delicate flavour. |
| Sebago | Mid to Late Season | Great for mashing, baking, and chips | Fluffy texture when cooked. All-rounder in the kitchen and very easy to grow. |
| Nicola | Early to Mid Season | Perfect for boiling, steaming, and salads | Low glycemic index (GI) waxy potato that holds shape. Mild flavour with yellow flesh and high yield. |
| White Star | Early Season | Great for frying, wedges, and boiling | Light skin with white flesh. Fast-growing, high-yielding variety with fluffy texture when cooked. |
Preparing Potatoes for Planting
Proper preparation of seed potatoes is critical for strong growth. Before planting, ensure they are stored in a cool, dark place. Wait until you’re ready to plant them in your garden or containers.
Chitting is a popular method to encourage sprouting. To chit your seed, place them in a bright, frost-free area. Soon, you’ll see green shoots emerging, which helps jumpstart their growth.
Here’s a quick guide to prepare your seed potatoes:
- Inspect for rot or disease.
- Cut large potatoes, ensuring each piece has an “eye.”
- Allow cut surfaces to dry for a few days before planting.
Properly preparing your seed potatoes sets the stage for a prosperous harvest. With sprouted eyes, your potatoes will establish quickly once planted.
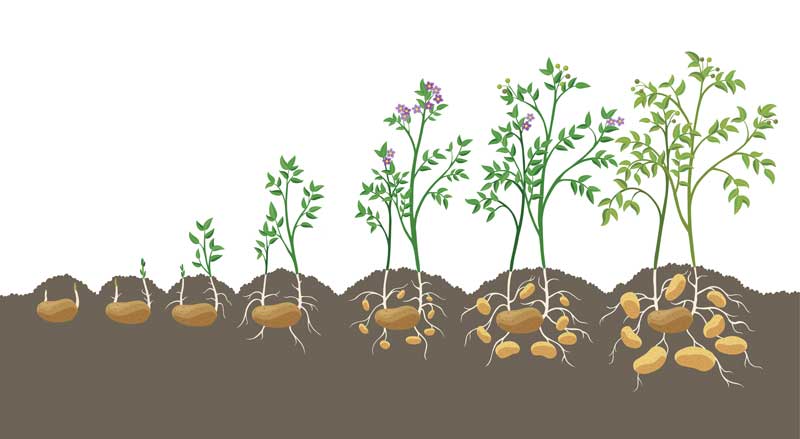
Planting and Growing Potatoes: Step-by-Step
Planting potatoes involves a few simple steps for maximum yield. First, choose a sunny spot with well-drained soil. Potatoes require at least 6-8 hours of full sunlight daily.
Prepare the soil by loosening it about 12 inches deep. Incorporate organic compost to enrich the soil. Aim for a slightly acidic pH between 5.0 and 6.5, which suits potatoes well.
Plant seed potatoes 4-6 inches deep, spacing them 12-15 inches apart. This gives ample room for tubers to grow. Space rows about 3 feet apart.
A step-by-step guide for planting:
- Test soil pH and adjust if necessary.
- Cut and cure seed potatoes with eyes.
- Dig trenches or holes, place potatoes cut side down.
- Cover with soil, then water.
Maintain consistent watering throughout the growing season. Water deeply, especially during tuber formation. Hill soil around plants as they grow for better support.
For best results, monitor for pests and use natural methods to control them. With careful attention, your potato plants will thrive.
Common Problems and How to Avoid Them
Growing potatoes can present challenges like pests and diseases. Common issues include blight, potato beetles, and aphids. These can damage plants and reduce yield.
To prevent problems, consider these strategies:
- Rotate crops yearly to reduce soil-borne diseases.
- Choose disease-resistant potato varieties.
- Monitor plants regularly and remove affected leaves promptly.
Using natural predators or traps can manage pests effectively. Remember to avoid overwatering as it encourages rot and disease. With vigilance and care, you can maintain healthy potato plants and enjoy a bountiful harvest.
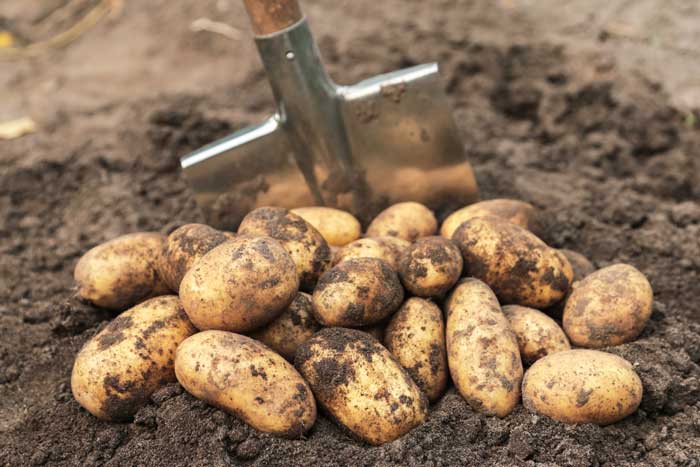
Harvesting and Storing Your Potatoes
Harvest your potatoes when the leaves yellow and die back. This indicates that the tubers have matured.
Once harvested, allow the potatoes to cure in a cool, dark space. This process heals the skins and prepares them for storage, ensuring they last longer. Store cured potatoes in a well-ventilated, dry area.
Conclusion: Start Growing Potatoes with Confidence
Starting your journey of growing potatoes can be both fulfilling and rewarding. With the right potato seeds and proper care, you’ll enjoy a good yield.
Remember to select the appropriate seed potatoes and follow the planting guidelines. This will improve your success rate. With patience and diligence, you’ll soon be enjoying delicious home-grown potatoes straight from your garden.
It is helpful. Thank you!